Appearance
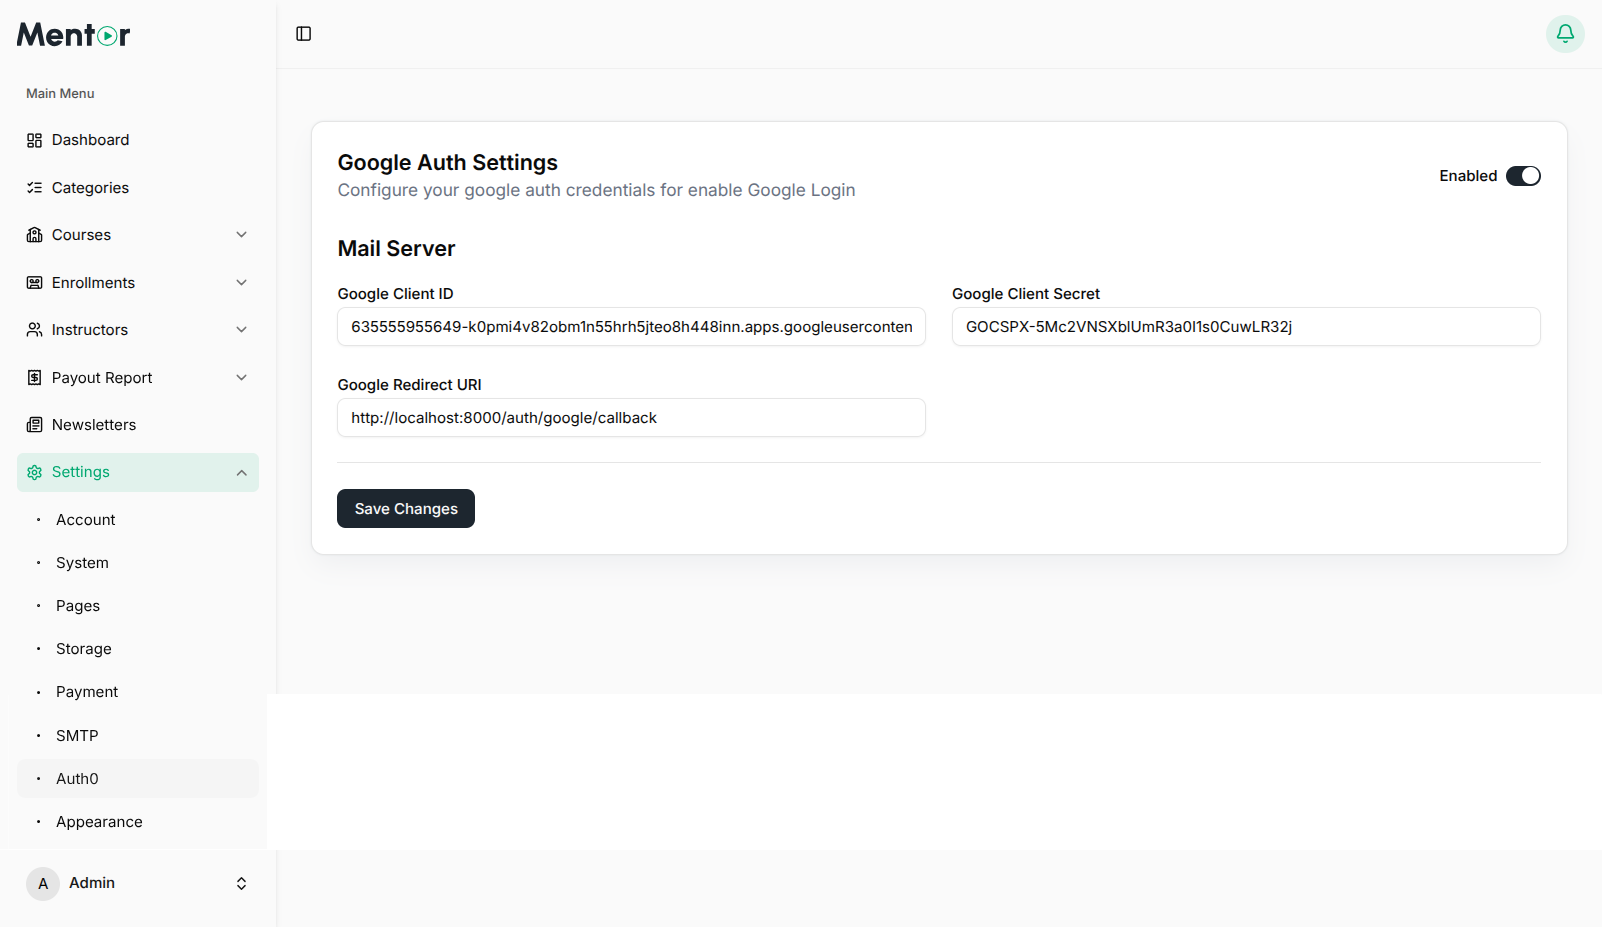
Google Authentication
Enabling Google Authentication allows users to sign up and log in to your Mentor LMS using their Google accounts. This provides a convenient login option and can increase user registrations.
Accessing Google Auth Settings
- Log in to your admin dashboard
- Navigate to Settings in the sidebar menu
- Select Social Login Settings from the dropdown options
Setting Up Google OAuth
Step 1: Create a Google Cloud Project
- Go to the Google Cloud Console
- Click on the project dropdown at the top left corner and select New Project
- Enter a name for your project and click Create
- Select your newly created project from the project dropdown
Step 2: Configure the OAuth Consent Screen
- In the Google Cloud Console, navigate to APIs & Services > OAuth consent screen
- Select External user type (unless you're using Google Workspace)
- Fill in the required application information:
- App name: Your LMS name
- User support email: Your support email
- Developer contact information: Your email address
- Click Save and Continue
- Add scopes (at minimum, select
emailandprofile) - Click Save and Continue
- Add test users if you're in testing mode
- Click Save and Continue
Step 3: Create OAuth Credentials
- In the Google Cloud Console, navigate to APIs & Services > Credentials
- Click Create Credentials and select OAuth client ID
- For Application type, select Web application
- Provide a name for your OAuth client
- Add authorized JavaScript origins (the domain where your LMS is hosted):
https://your-domain.com - Add authorized redirect URIs (the URL Google will redirect to after authentication):
https://your-domain.com/auth/google/callback - Click Create
- A popup will appear showing your Client ID and Client Secret - save these values (You can always view them later by clicking the edit icon next to your OAuth client ID)
Step 4: Configure Your LMS
- Return to the Mentor LMS admin dashboard
- In Social Login Settings, toggle Enable Google Login to Yes
- Enter your Google OAuth credentials:
- Client ID: Your Google OAuth client ID
- Client Secret: Your Google OAuth client secret
- Callback URL: This should be pre-filled with the correct URL
- Click Save Changes
Testing Google Authentication
After configuring Google Auth:
- Log out of your admin account
- Go to the login page of your LMS
- You should see a "Login with Google" button
- Click the button and attempt to log in with a Google account
- Verify that the authentication process completes successfully
Troubleshooting Google Auth
If you encounter issues with Google Authentication:
- Verify Credentials: Double-check your Client ID and Client Secret
- Check Redirect URI: Ensure the callback URL in Google Console exactly matches your LMS configuration
- OAuth Consent Screen: Make sure you've completed the OAuth consent screen setup
- API Enabled: Ensure the Google+ API or Google People API is enabled in your Google Cloud project
- Https Required: Google OAuth requires HTTPS for production applications
- Verify Domain: If using domain verification, ensure your domain is properly verified
- Published Status: If your app is in "Testing" status, only authorized test users can log in
Security Considerations
When implementing Google Authentication:
- Store Credentials Securely: Never expose your Client Secret in client-side code
- Request Minimal Scopes: Only request the user data you actually need
- Privacy Policy: Update your privacy policy to reflect data collected via Google Auth
- Regular Audits: Periodically review who has access to your Google Cloud project
- Monitor Usage: Check for any unusual authentication patterns