Appearance
Storage Setup
Mentor LMS supports multiple storage options for your course files, videos, and other media content. This page explains how to configure your storage settings.
Accessing Storage Settings
- Log in to your admin dashboard
- Navigate to Settings in the sidebar menu
- Select Storage Settings from the dropdown options
Available Storage Options
Mentor LMS offers two primary storage options:
Local Storage
The default option that stores all files on your web server. This is suitable for smaller installations or when starting out.
Pros:
- No additional configuration required
- No extra costs
- Simple management
Cons:
- Limited by your server's disk space
- May affect server performance with many files
- Potential bandwidth limitations
Amazon S3 Storage
Store your files on Amazon's secure and scalable cloud storage service. Recommended for production environments and larger installations.
Pros:
- Virtually unlimited storage capacity
- Better performance for file delivery
- Reduced load on your web server
- Global content delivery network (CDN) integration
- Higher reliability
Cons:
- Requires an AWS account
- Additional costs based on storage and bandwidth usage
- More complex initial setup
Configuring Local Storage
- In Storage Settings, select Local Storage as your storage driver
- Click Save Changes
TIP
For local storage, ensure your server has sufficient disk space for your anticipated media uploads.
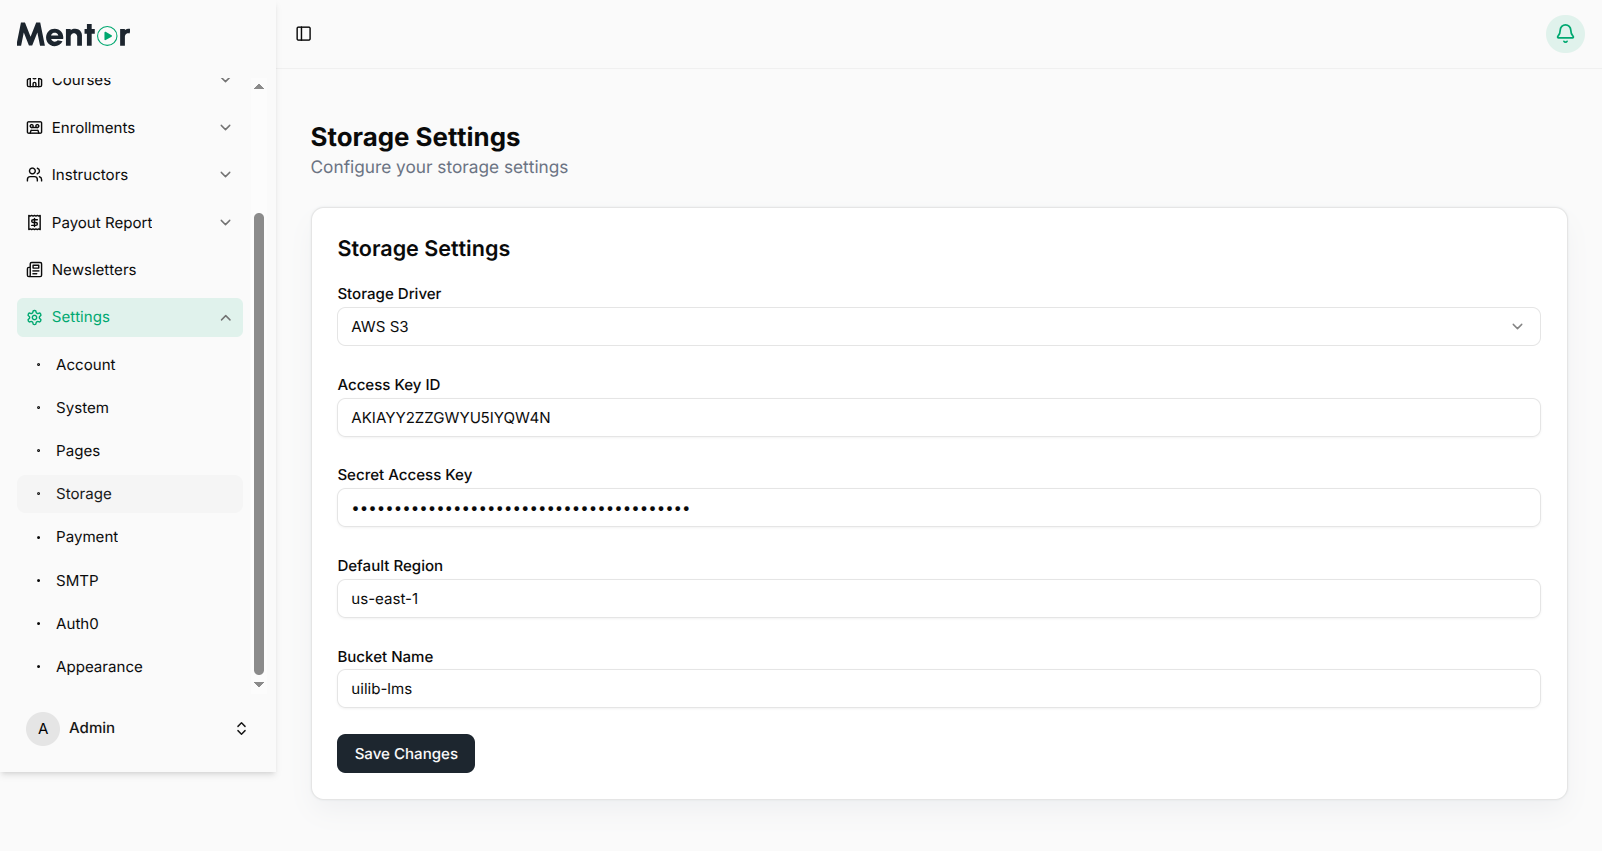
Configuring Amazon S3 Storage
In Storage Settings, select Amazon S3 as your storage driver
Enter the following AWS credentials:
- AWS Access Key ID: Your AWS account access key
- AWS Secret Access Key: Your AWS account secret key
- AWS Default Region: The AWS region where your bucket is located (e.g., us-east-1)
- AWS Bucket: The name of your S3 bucket
- AWS URL: The URL endpoint for your bucket (typically https://your-bucket-name.s3.amazonaws.com)
Click Save Changes
WARNING
Keep your AWS credentials secure. Never share your access keys or expose them in client-side code.
Setting Up an Amazon S3 Bucket
If you're using Amazon S3 storage, follow these steps to create and configure your bucket:
- Log in to the AWS Management Console
- Navigate to S3 service
- Click Create bucket
- Name your bucket and select a region close to your target audience
- Configure bucket settings:
- Under Permissions, uncheck "Block all public access" (as course files need to be publicly accessible)
- Enable CORS (Cross-Origin Resource Sharing) with the following policy:
json
[
  {
    "AllowedHeaders": ["*"],
    "AllowedMethods": ["GET", "PUT", "POST", "DELETE"],
    "AllowedOrigins": ["https://your-domain.com"],
    "ExposeHeaders": []
  }
]- Create an IAM user with S3 access and generate access keys
Best Practices for Media Storage
- Image Optimization: Compress images before upload to save storage space
- Video Hosting: Consider using YouTube or Vimeo integration for video content instead of direct uploads
- Regular Backups: Implement a backup strategy regardless of storage option
- File Size Limits: Configure reasonable upload limits in your PHP and server settings
After configuring your storage settings, proceed to Payment Gateway Setup to enable payment processing for your courses.