Appearance
Payment Gateways
Mentor LMS supports multiple payment gateways to process course purchases. This page guides you through setting up each supported payment processor.
Accessing Payment Settings
- Log in to your admin dashboard
- Navigate to Settings in the sidebar menu
- Select Payment Settings from the dropdown options
Supported Payment Gateways
Mentor LMS supports the following payment processors:
- PayPal
- Stripe
- Mollie
- Paystack
- Razorpay
- SSLCommerz
You can enable one or multiple payment gateways based on your requirements and geographic location.
Configuring PayPal
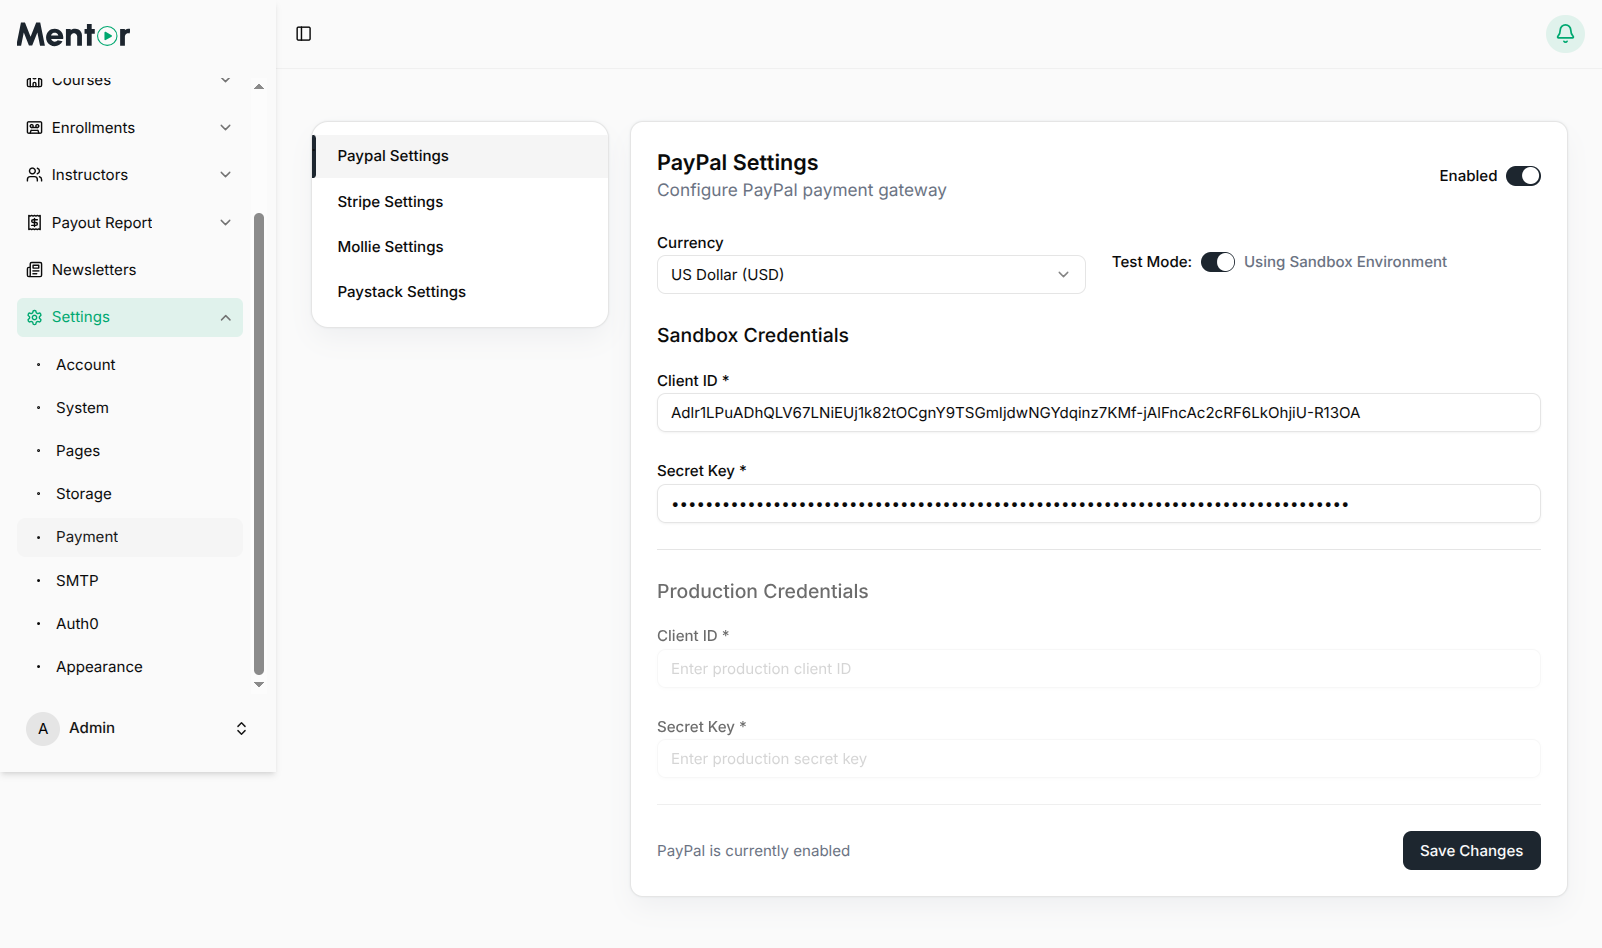
- In the Payment Settings tab, find the PayPal section
- Toggle Enable PayPal to Yes
- Select the Mode:
- Sandbox: For testing (recommended during setup)
- Live: For processing real transactions
- Enter your PayPal credentials:
- Client ID: Your PayPal API client ID
- Secret Key: Your PayPal API secret key
- Click Save Changes
Obtaining PayPal API Credentials
- Log in to PayPal Developer Dashboard
- Navigate to Apps & Credentials
- Click Create App and provide a name for your application
- Select the environment (Sandbox or Live)
- After creation, copy the Client ID and Secret
- Configure the webhook URL as:
https://your-domain.com/payment/paypal/webhook
Configuring Stripe
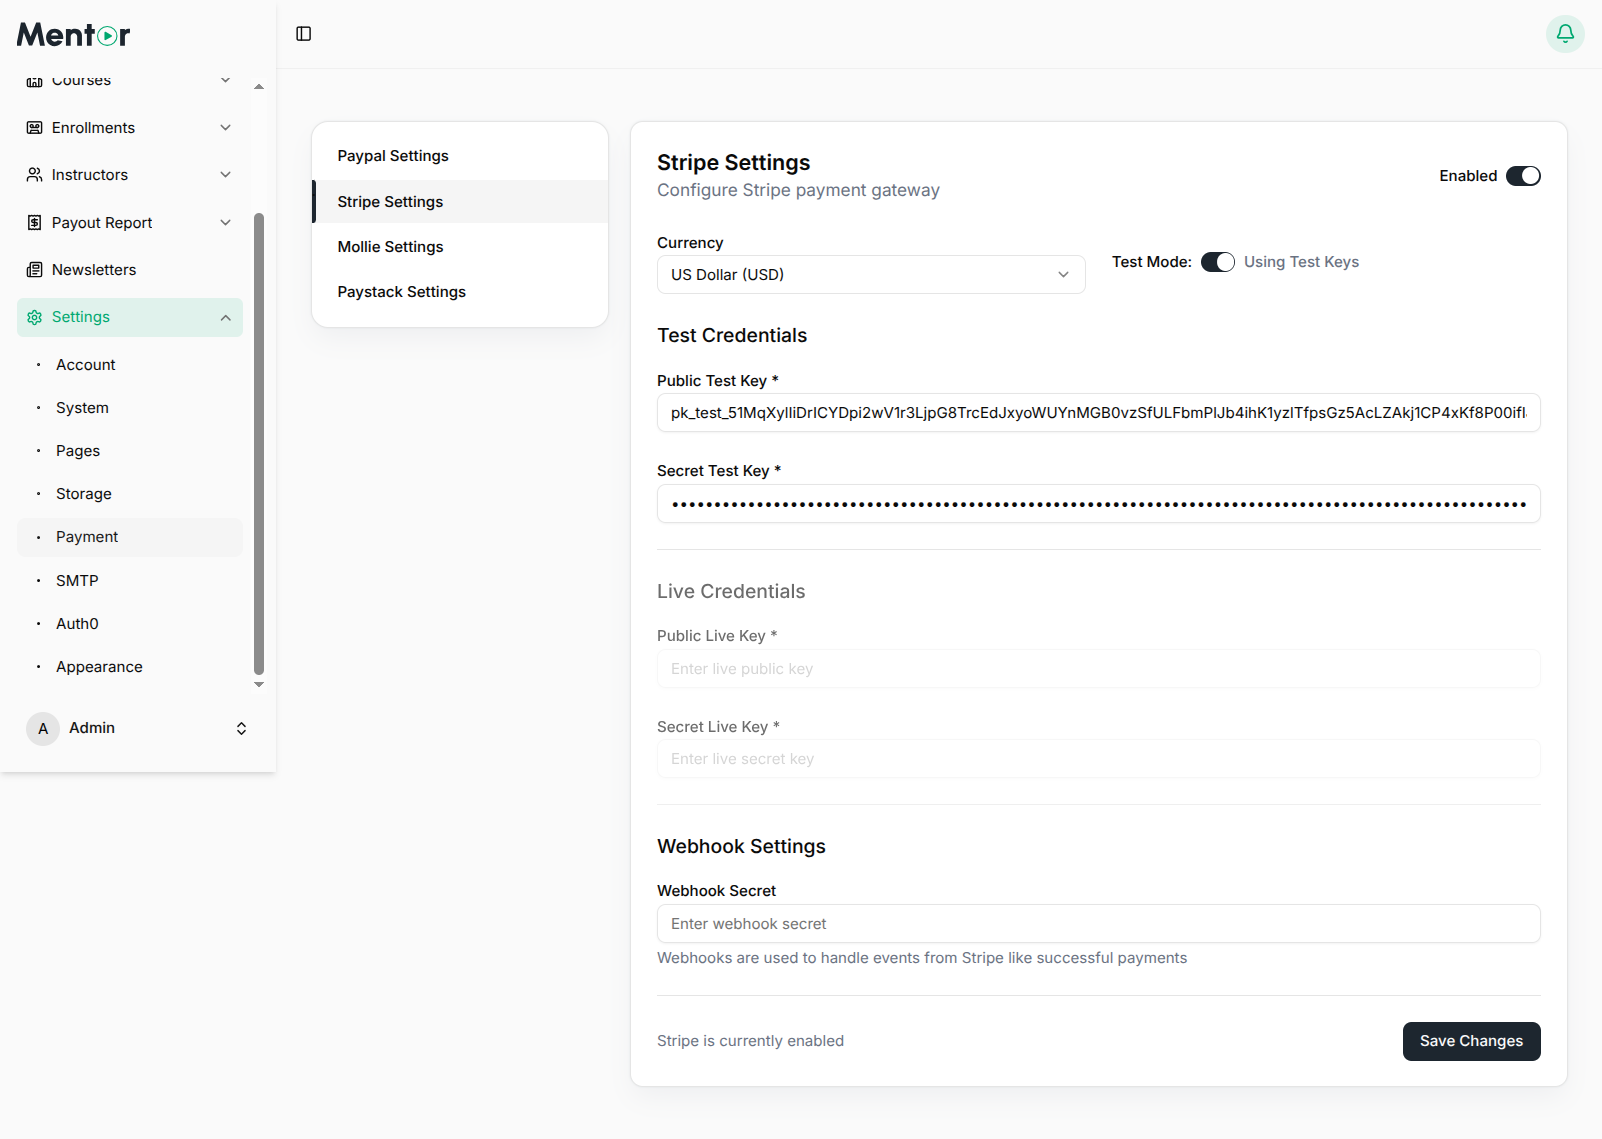
- In the Payment Settings tab, find the Stripe section
- Toggle the Enabled switch to activate Stripe
- Configure Test Mode:
- Toggle Test Mode to use test credentials during development
- When enabled, you'll see "Using Test Keys" indicator
- Enter your Stripe credentials:
- Test Credentials:
- Public Test Key: Your Stripe test publishable key
- Secret Test Key: Your Stripe test secret key
- Live Credentials (for production use):
- Public Live Key: Your Stripe live publishable key
- Secret Live Key: Your Stripe live secret key
- Test Credentials:
- Set up Webhook Settings:
- Webhook Secret: Enter your Stripe webhook signing secret
- Click Save Changes
Obtaining Stripe API Credentials
- Log in to your Stripe Dashboard
- Navigate to Developers > API Keys
- Copy your Publishable key and Secret key (both test and live versions)
- Go to Developers > Webhooks
- Create a new webhook endpoint with URL:
https://your-domain.com/payment/stripe/webhook - Select the necessary events (payment_intent.succeeded, payment_intent.failed, etc.)
- Copy the signing secret to use as Webhook Secret
Configuring Mollie
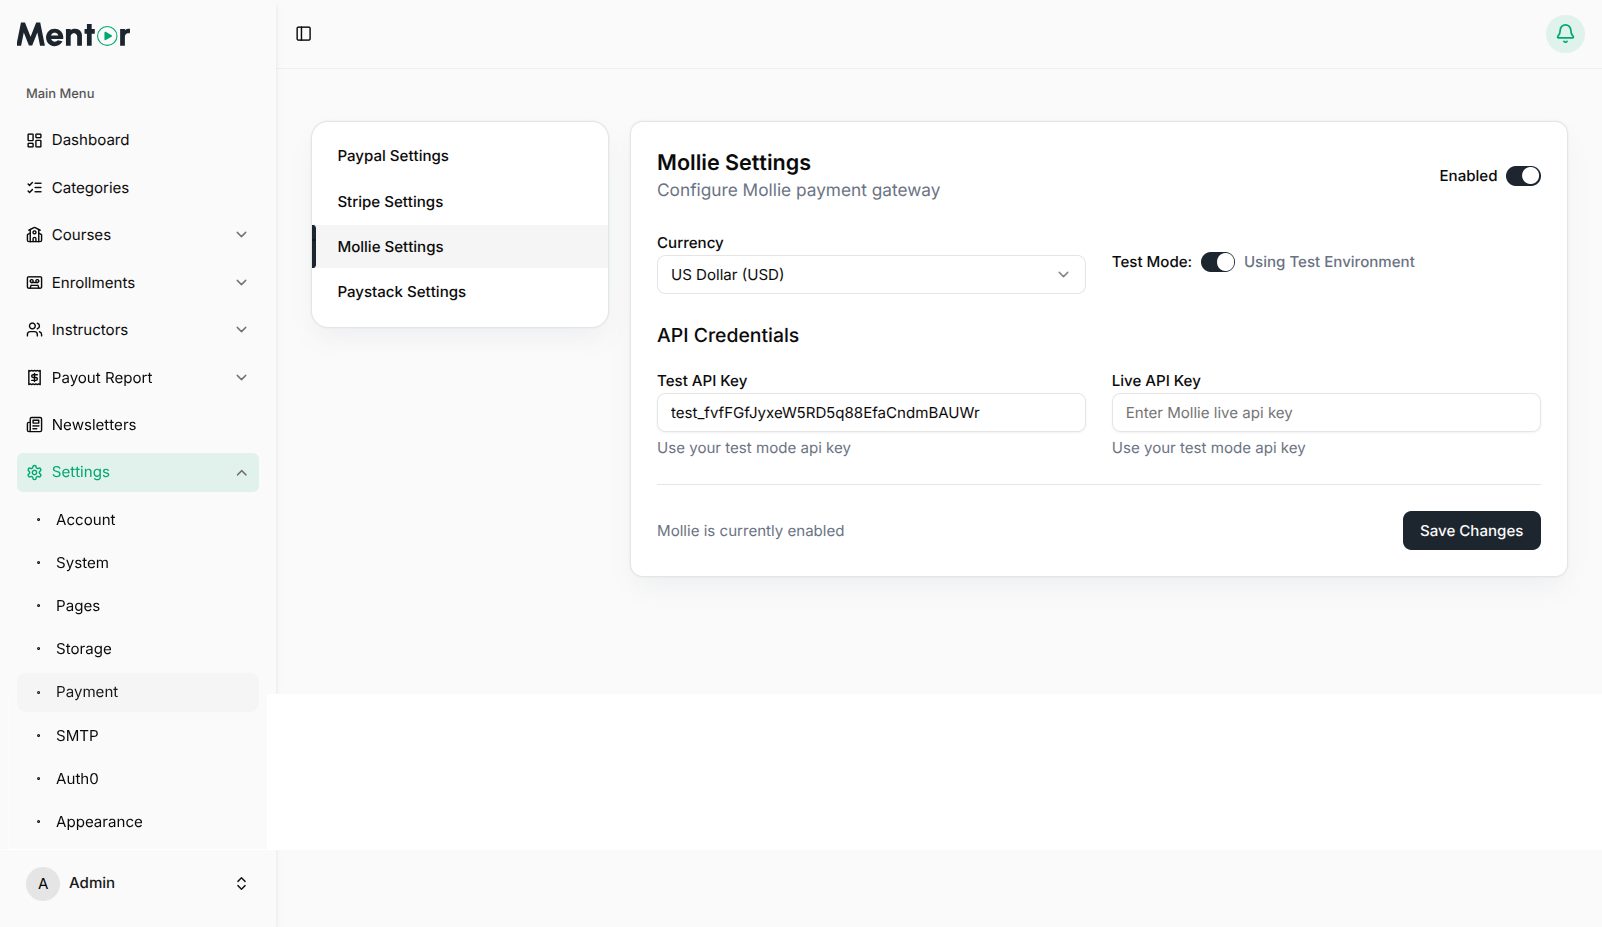
- In the Payment Settings tab, find the Mollie section
- Toggle the Enabled switch to activate Mollie
- Configure Test Mode:
- Toggle Test Mode to use test environment during development
- When enabled, you'll see "Using Test Environment" indicator
- Enter your Mollie credentials:
- Test API Key: Your Mollie test API key
- Live API Key: Your Mollie live API key (for production use)
- Click Save Changes
Obtaining Mollie API Key
- Log in to your Mollie Dashboard
- Navigate to Developers > API keys
- Copy your API keys (both test and live versions)
- Set up webhook URL as:
https://your-domain.com/payment/mollie/webhook
Configuring Paystack
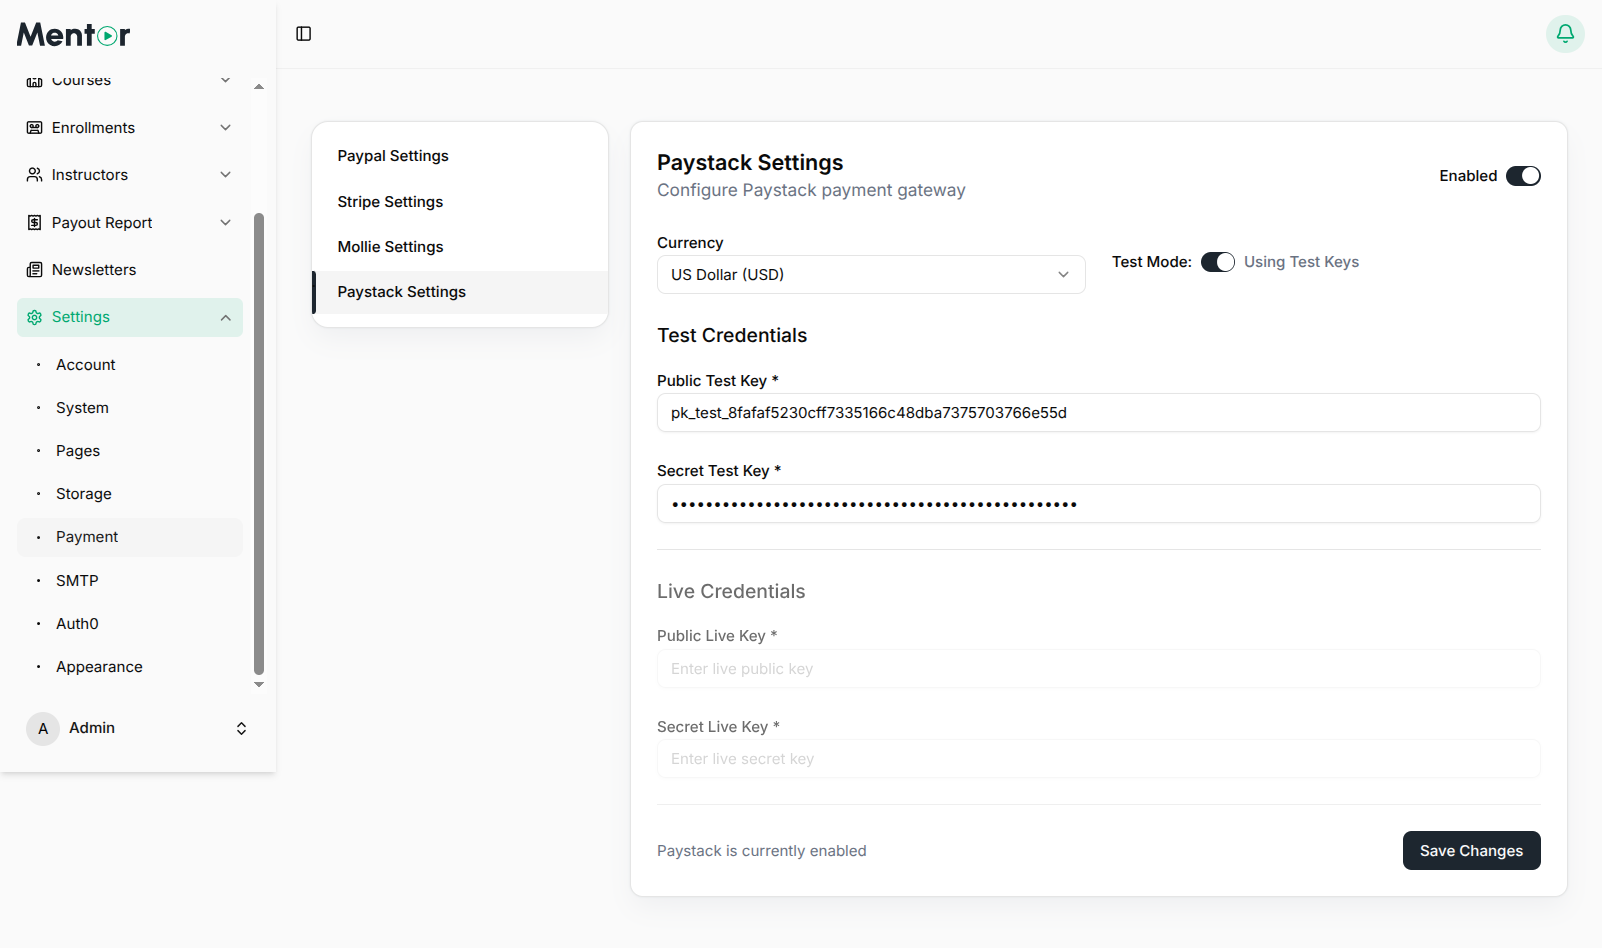
- In the Payment Settings tab, find the Paystack section
- Toggle the Enabled switch to activate Paystack
- Configure Test Mode:
- Toggle Test Mode to use test credentials during development
- When enabled, you'll see "Using Test Keys" indicator
- Enter your Paystack credentials:
- Test Credentials:
- Public Test Key: Your Paystack test public key
- Secret Test Key: Your Paystack test secret key
- Live Credentials (for production use):
- Public Live Key: Your Paystack live public key
- Secret Live Key: Your Paystack live secret key
- Test Credentials:
- Click Save Changes
Obtaining Paystack API Credentials
- Log in to your Paystack Dashboard
- Navigate to Settings > API Keys & Webhooks
- Copy your Public and Secret keys (both test and live versions)
- Configure webhook URL as:
https://your-domain.com/payment/paystack/webhook
Configuring Razorpay
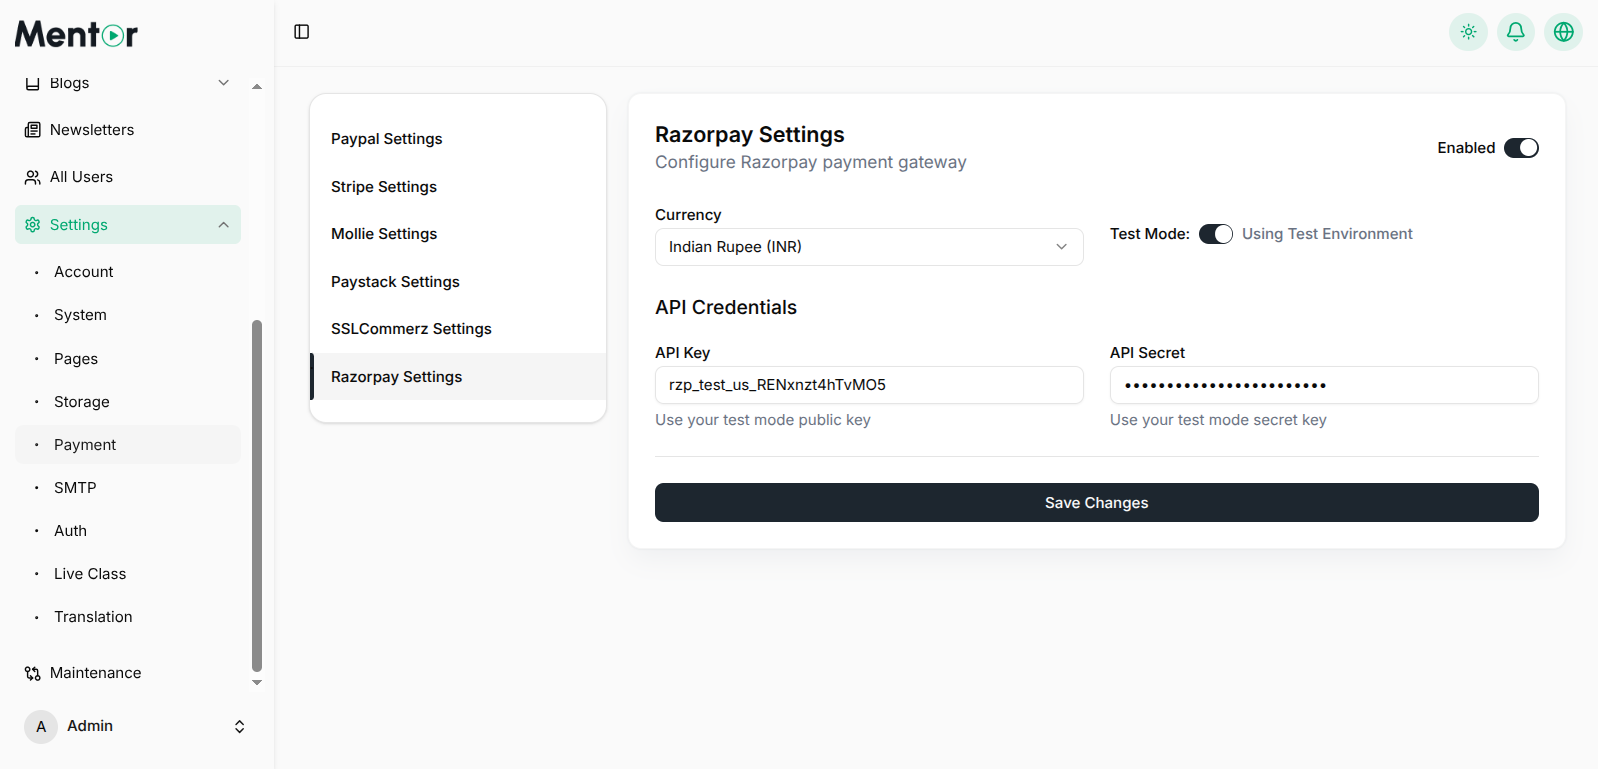
- In the Payment Settings tab, find the Razorpay section
- Toggle the Enabled switch to activate Razorpay
- Select your preferred Currency (e.g., Indian Rupee - INR)
- Configure Test Mode:
- Toggle Test Mode to use test environment during development
- When enabled, you'll see "Using Test Environment" indicator
- The form will switch to show test credential fields
- Enter your Razorpay API credentials:
- API Key: Your Razorpay API key (test or live, depending on Test Mode)
- API Secret: Your Razorpay API secret key (test or live, depending on Test Mode)
- Helper text will indicate whether to use test or live credentials
- Click Save Changes
Obtaining Razorpay API Credentials
- Log in to your Razorpay Dashboard
- Navigate to Settings > API Keys
- Click Generate Key to create new API credentials (if not already created)
- Copy your API Key ID and API Secret (both test and live versions)
Configuring SSLCommerz

- In the Payment Settings tab, find the SSLCommerz section
- Toggle the Enabled switch to activate SSLCommerz
- Select your preferred Currency (e.g., Bangladeshi Taka - BDT)
- Configure Test Mode:
- Toggle Test Mode to use test environment during development
- When enabled, you'll see "Using Test Environment" indicator
- The form will switch to show test credential fields
- Enter your SSLCommerz credentials:
- Store ID: Your SSLCommerz store ID (test or live, depending on Test Mode)
- Store Password: Your SSLCommerz store password (test or live, depending on Test Mode)
- Helper text will indicate whether to use test or live credentials
- Click Save Changes
Obtaining SSLCommerz API Credentials
- Log in to your SSLCommerz Dashboard
- For Test Credentials:
- SSLCommerz provides default test credentials for sandbox testing
- Navigate to Sandbox section in your dashboard
- You can use the provided test Store ID and Store Password
- For Live Credentials:
- Navigate to Settings > Store Settings
- Your Store ID will be displayed in your account information
- For Store Password, go to API Credentials or Integration section
- Copy your Store ID and Store Password
Testing Payment Gateways
After configuring your payment gateways:
- Switch to Sandbox/Test mode
- Create a test course with a price
- Try purchasing the course using the test credentials
- Verify the transaction appears in both your payment gateway dashboard and your LMS admin panel
Test Card Numbers
For testing in sandbox/test mode, use these cards:
- PayPal Sandbox: Create test accounts in PayPal Developer Dashboard
- Stripe Test: Card number
4242 4242 4242 4242, any future expiry date, any 3-digit CVC - Mollie Test: Follow Mollie's testing documentation
- Paystack Test: Card number
4084 0840 8408 4081, any future expiry date, any 3-digit CVC - Razorpay Test: Card number
4111 1111 1111 1111, any future expiry date, any 3-digit CVV - SSLCommerz Test: Use the test cards provided in SSLCommerz sandbox documentation
After configuring your payment gateways, proceed to SMTP Email Setup to ensure your system can send transactional emails.